The Trick I've Used Since Design School
I mentioned in an earlier post that I don't use graph paper. The confession usually gets one of two responses: fellow designers nod in recognition, and everyone else asks, "Then how do you plan a room?"
The answer is watercolor. Not the kind you frame. The kind you use to think.
For fifteen years — through design school, eight years of client work, and now our own 1920s bungalow — I've planned every significant room layout in a small watercolor notebook. It's the single most useful design trick I know, and unlike expensive software or a professional consultation, it costs about fifteen dollars and an afternoon to learn.
Here's exactly how I do it, step by step, so you can steal the whole method.
Why Watercolor Instead of Software or Graph Paper
People ask me this constantly. There are free room-planning apps. There's good old-fashioned graph paper. Why watercolor?
Software is precise, but it forces precision too early. When you drag and drop a sofa in a rendering app, you commit to its size, its exact placement, its orientation — before you've fully understood the room. Graph paper is better, but the grid makes everything feel squared-off and final. Watercolor, by contrast, is loose and forgiving. A wash of color doesn't demand a dimension. It suggests a mood, a zone, a possibility.
When I sketch in watercolor, I'm not making a blueprint. I'm having a conversation with the room. The softness of the medium keeps me from locking in decisions before I'm ready.
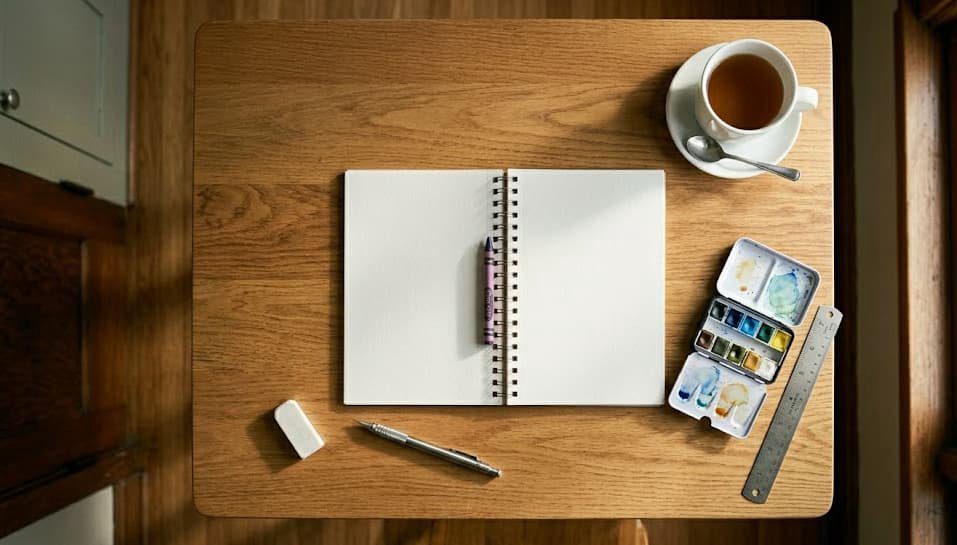
What You Need (Almost Nothing)
Tool | Why This | Approximate Cost |
|---|---|---|
A5 watercolor notebook | Lies flat, handles light washes without buckling, portable | $10–15 |
Travel watercolor set (8–12 colors) | Small, easy to use at a kitchen table, enough pigment for room sketches | $12–20 |
Mechanical pencil (0.5mm) | Fine lines let you adjust endlessly without tearing the paper | $5 |
Metal ruler (6-inch) | For scaling walls and doorways — I work roughly at 1/4 inch = 1 foot | $5 |
A good eraser | Because the first layout is never the right one | $2 |

Step 1: Measure What Matters
I don't measure every outlet. I focus on what won't move: wall lengths, door and window placements, radiators or vents, and any structural features like the beam in our living room. I write these dimensions directly on the sketch, not in a separate list. Keeping measurements on the same page means I won't lose a critical number later.
Draw the empty room in pencil. Just the shell. No furniture yet.
Step 2: Map the Light and the Paths
Before I draw a single chair, I mark three things with arrows: where natural light enters the room, the main entry point, and the natural walking path someone would take if the room were empty. This is the step most people skip, and it's the one that reveals more about how a room should function than any furniture catalog.
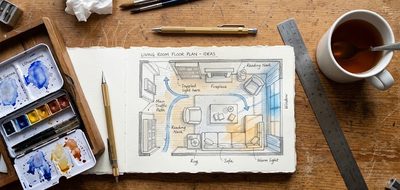
Now I switch to paint. A pale blue wash traces the circulation path — where feet will travel. A soft ochre wash shows where sunlight lands at different times of day. Green marks the zones I want people to linger in. These colors aren't decorative. They're diagnostic. They tell me whether the room works before I've committed to a single piece of furniture.
Step 3: Furniture in Pencil, Adjust in Paint
Only now do I sketch the furniture — lightly, in pencil. Sofa, chairs, tables, shelving. I place them, then I trace the blue circulation path again. If the blue line cuts through a seating area, the layout is wrong. If the ochre never reaches the reading chair, that corner is probably too dark. If the green zone feels pinched rather than generous, the room needs fewer pieces.
This is the moment where bad layouts reveal themselves — before anything is bought or moved. I can erase. I can adjust. I can try three arrangements in fifteen minutes. The paint tells the truth that furniture showrooms won't.

How This Saved Our Dining Room
When I watercolored our dining room layout, the blue circulation path immediately exposed a problem. The natural walkway from the kitchen to the living room cut directly through where I'd planned to place the dining table. Anyone carrying food would have to navigate around seated guests. Anyone seated would feel a constant presence moving past their chair.
I shifted the table three feet toward the window, rotated it ninety degrees, and ran the blue wash again. The path now flowed along the wall, not through the seating. The room felt calmer, and I'd caught the mistake with a $15 paint set instead of a $1,200 dining table I couldn't return.
You Don't Need to Be an Artist
This method has nothing to do with drawing beautifully. It has everything to do with thinking honestly about how a room will be used. Your watercolor doesn't need to be frame-worthy. It needs to be true.
Take an afternoon. Measure a room. Draw the empty shell. Trace the light and the paths. Place the furniture. Then step back and ask yourself: does this room work, or does it just look good on paper?
If the answer is the second one, pick up the paintbrush and try again. The watercolor won't judge you, and it's a lot cheaper than a floor full of furniture that's in the wrong place.
Take your time — your house will still be here tomorrow.
No notes yet — write the first one.